Business Dashboard
Managing Seats in the Business Dashboard
Learn how to Add, Assign, and Remove the seats owned by your company
Updated 2 weeks ago
Adding Seats
To purchase subscriptions, which we refer to as seats, for the DevPass Business training, you and your company must have an account in the Business Dashboard. Select the 'Add Seats' button in the upper right corner. The process is the same whether this is your first purchase or you have already made multiple purchases.
After clicking the Add Seats button, you will be asked how many seats you wish to purchase.
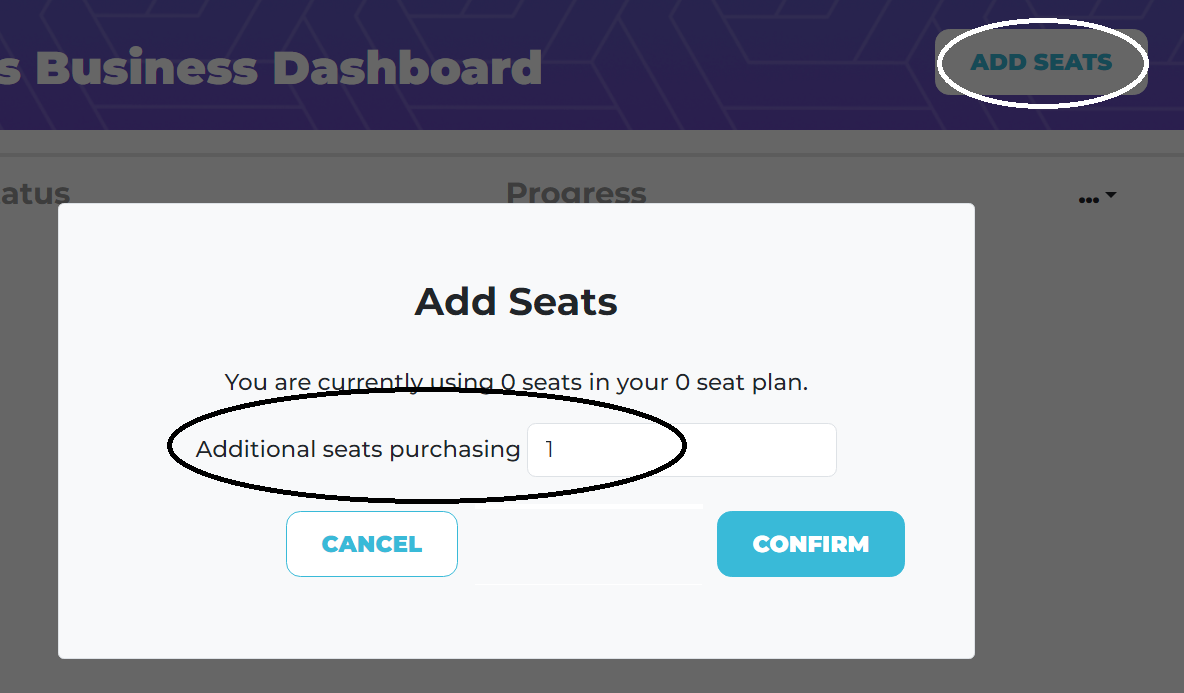
Enter the number of seats needed and click Confirm. A purchase pop-up will be presented from FastSpring, our payment platform. They are our merchant of record.
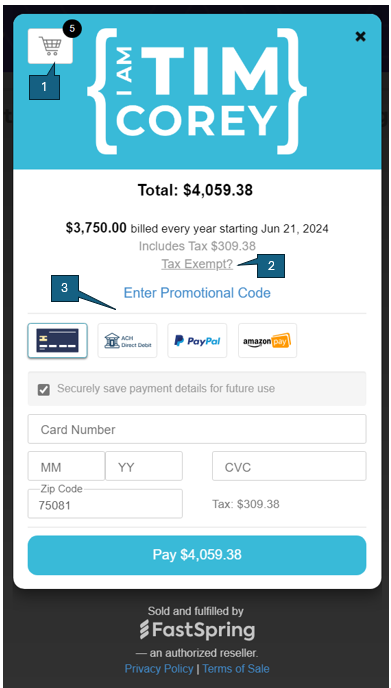
1) To change the volume of items in the cart, five in this example, please click on the cart icon. You can verify the per-item cost there as well.
2) For Tax Exempt purchases, click the 'Tax Exempt?' link and provide your attestation. This link is controlled by your location/tax region and may not be available to all users.
3) The default payment mode is a credit card. The payment options available to you are controlled by your location/tax region, and the shown options may not be available to all users. The layout of the pop-up may change based on the payment mode selected.
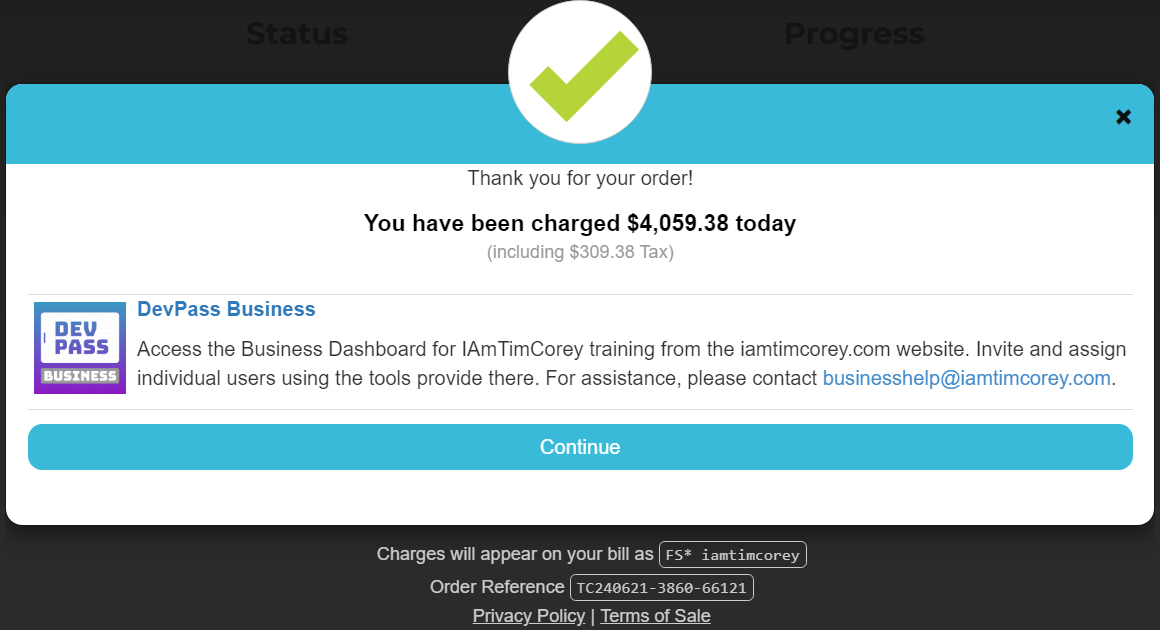
You will receive a purchase confirmation. Please click Continue.
After 5 minutes, please refresh your Dashboard Members page to see that the seats have been added to your page and are individually listed. They will be listed as "Unclaimed Seat". The renewal date and course progress status is presented for each seat.
Assigning Seats
Below are the options for assigning seats to employees.
NOTE: Even if you only purchased one subscription seat for yourself, you must assign it assign it to yourself before you can have access to the courses.
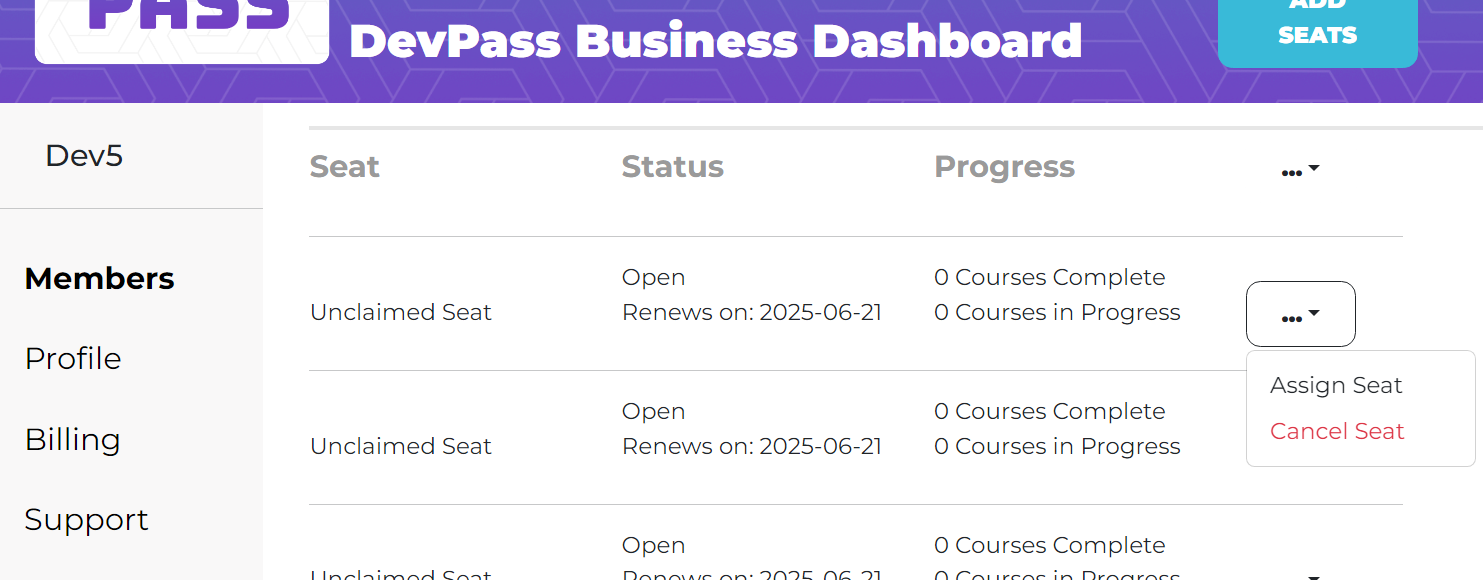
Assign seats individually
Seats may be manually assigned one at a time. To assign a seat, you will need the student's name and email address. Click on the ellipse and then 'Assign Seat'. A pop-up will request the student's name and email address. Enter the data and click 'Send Invitation'.
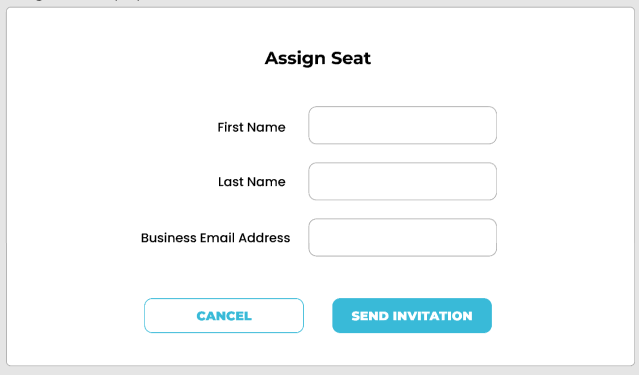
The student's information will be associated with that seat, the student will be automatically enrolled, and, if they are new to the platform, they will receive an email informing them of the enrollment and how to access the courses.
Assign seats in Bulk
If you have several seats to assign, you don't have to assign each one individually. We have a Bulk Assignment option. You will need to prepare a .csv file listing the students and their email addresses.
.CSV File Layout -The specific file layout should have First Name, Last Name, Email Address in the first/top row. Next, list the individual student's information on the following rows, one per row. Example:

If using Notepad, it would look like this:
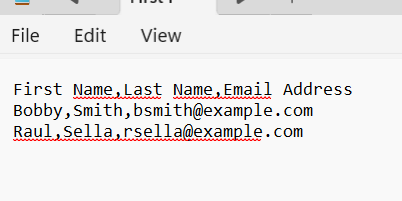
Either way works, as long as you save it as a .csv format.
To start the Bulk Assignment process, go to the Members page.
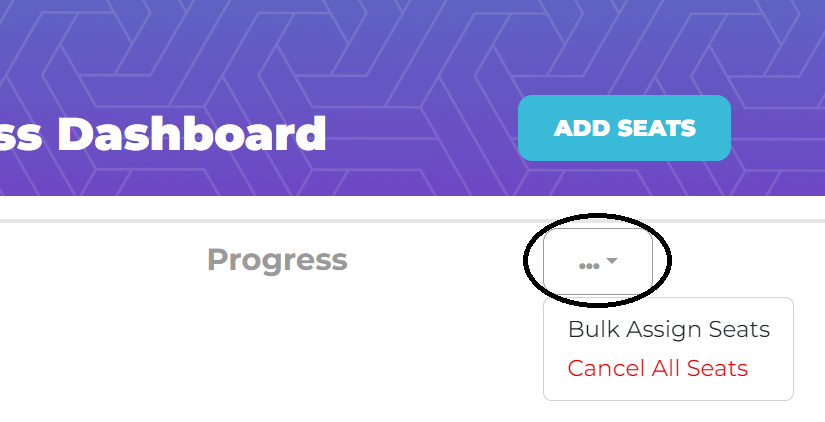
Select "Bulk Assign Seats"
On the popup window, click on 'Choose File', and select the CSV file with your seat assignments.
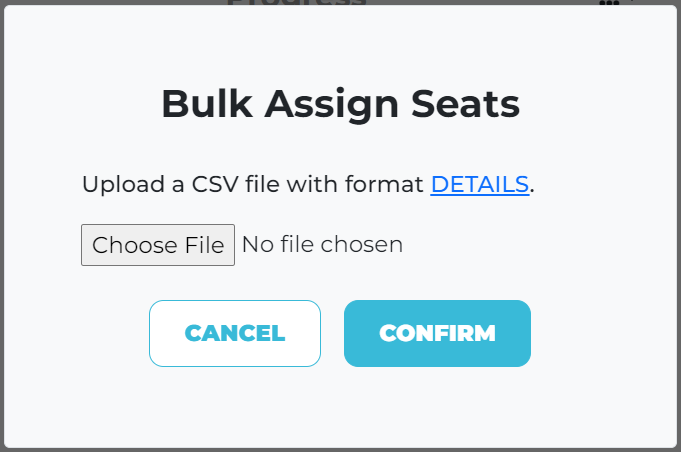
Once the file loads, wait 5 minutes and refresh your screen. The students should be assigned to the unclaimed seats.
Note: the number of students listed in your CSV file must be equal to or less than the number of unclaimed seats. If it is less, assignments will fill the unclaimed seats. Any remaining unclaimed seats will be at the bottom of the list.
If, in your CSV file, you have listed more students than you have unclaimed seats, you will get an error message and the process aborts without assigning any seats.
Remove persons from seats
Removing a student from a seat returns the seat to 'Unclaimed" status. The student is unenrolled from the courses. To accomplish this, click on the ellipse next to the student that you want to remove from enrollment, and select 'Remove Person'.
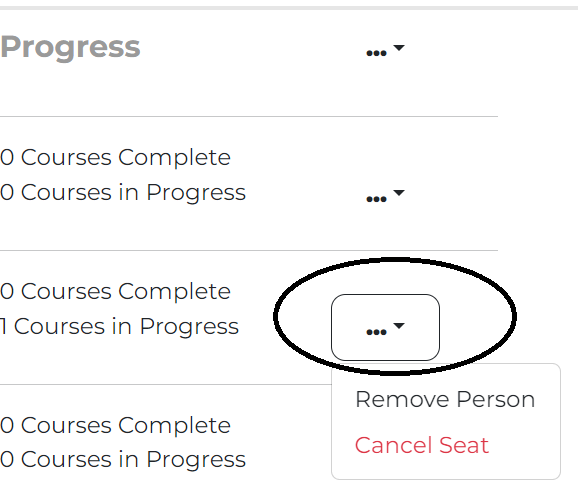
Removing seats opens the seat for reassignment. You can reassign the seat as often as you like during the life of the subscription. Please be aware that, depending on the sorting you have on the Members page, changing the seat to 'Unclaimed' may move it to the bottom of the list and possibly off the page.
Please be careful using the 'Cancel Seat' option. Selecting it will set the entire subscription to "cancel" state and it will not be renewed at the end of the subscription period. 'Cancel Seat' will not remove the student from the subscription.

